Posts

doing too much work on the camper to put up a post

Image
so in the mean time here's some pics of recent progress floors Done! framing 90% Done! Insulation 60% done windows...half way through polishing, all the gaskets are out of stock and on order from VTS Going to order my new skin on Saturday Electrical....ready to wire and hire an electrician for the hard stuff What is the hold up.....well the street side skin doesn't line up with the framing in the back....diagnosis....50 yr slump....prognosis....not sure yet. Trying to jack it up if that doesn't work will just adjust everything. new floor used homasote 440 with butyl window flashing instead of asphalt celotex board, then 3/8" CDX plywood framing First piece of interior birch replaced!

Not gettin' much done, here's why

Image
Have been a little preoccupied this week. Ben my 12 yr old attends oakland school for the arts. He has been in a school production called "That 60's Show". He had the opportunity to sing the lead on Dylan's The Times they are a Changing. Have a look. Hope the trailer turns out as well as this performance...though I doubt the finished product will bring a tear to my eye as this did.

bones and fun!

Image
Bones: Have cut and dry fit sub floor front and back. It's slow progress with the few hours here and there I'm able to put in. April will be a big month for getting this done. Hopefully once a few of the puzzle pieces fit together it will go faster. Right now it's still do a little, scratch my head a little. Before it's attached, will adhere butyl based flashing on the undercarriage and maybe at some other strategic points where water tends to be a problem. Next step make sure that the framing matches the skin. Finishing touches: I made a quilt a while back for the bed when I thought all I was going to have to do the camper was add a few finishing touches. Just got the top back from the machine quilter and finished the binding. The second picture is a close up of the quilt stitch design, which I think has a very "jetsons" flair to it. The quilting is done on a big long arm quilting machine, takes 1/20 the time of quilting by hand. I th...

and it's still pouring

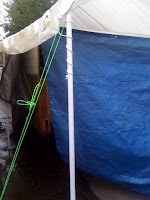
shelter has caved in twice, 50 mph gusts, 3 inches of rain since yesterday. They say that we will see the sun on Sunday...and then next week looks good. Gonna try to get some polishing done on the rails, and maybe a little framing. Gotta wait for it to be dry to do much else. sigh.

rain rain rain and wind

Image
Dang. Had to stop midway through tarping up today. Bent over and strained my back. Hoping everything doesn't blow away tonight. High wind watch through mid day tomorrow--very unusual for this area. Anchored shelter to fence and house with eye bolts. Was going to secure the tarp better under too....and then I tweaked my back! So no stretching for me today :(

What's in a name?

Image
Aguadream what kind of name is that? Well here goes for the explanation. My son and I are both whitewater kayakers. Ben taking on one of the bigger rapids on the South Fork American at age 10 Mom (me) on the South Fork I've been involved in river conservation and advocating for clean water in one way or another for the past 30 yrs. Ben and me on one of his first river trips approx age 5 on educational trip down the Mokelume River Our plan is to repaint this trailer somewhere in the aqua/blue/green range. And the interior decor curtains, quilt, seat covers etc... same. The color scheme for Aguadream We'll be pursuing a dream I've had for some time this summer-- to take the summer off and tour the west with my 13yr old. He'll be participating in the kayak junior olympics, and we'll also explore rivers in Colorado, Idaho, Washington, Oregon and Wyoming. So traveling in our newly renovated Shasta trailer will be an Aguadream. Ben in a junior ol...

Loving that Kreg Jig

Got a bunch of framing done today. The first dry day since Saturday. Using the Kreg pocket screw jig which makes everything feel really nice and solid. Coming up Wheel well framing (using a solid piece) both sides Curve framing floor and subfloor in the back. Reinforce all visible joints Reframe front After framing....replace old wiring with romex. Adding one outlet. then......... I added a gadget to the blog showing how to use the jig, on the side bar